Siltek® Treated: cat.#s 24217, 24160, 24161, 24162, 24163, 24164, 22101, 26253, 26255, 26257, 26259; Stainless Steel: cat.#s 24216, 24165, 24166, 24167, 24168, 24169, 22100, 26252, 26254, 26256, 26258; Replacement frits & washers: 24170, 24171
The Passive Air Sampling Kit includes the following parts:
(Note: all stainless steel components are coated for Siltek® versions.)
- 2 μm frit/filter
- Spring washer
- Interchangeable critical orifice
- Veriflo® SC423XL flow controller
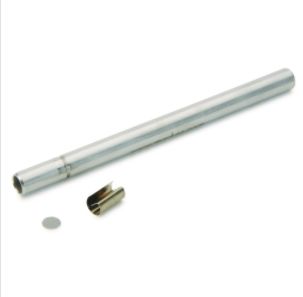
- Sampling tube
- Vacuum gauge
Overview
Passive sampling is a nonpressurized sampling technique. It uses differential pressure from an evacuated canister to create a sample flow into the canister. There are two types of passive sampling techniques: grab sampling and integrated sampling. Grab sampling is used to collect the sample in the canister over a very short time interval. Integrated sampling is taken over a much longer time interval (one to 24 hours). Both of these sampling techniques can incorporate a critical orifice to control flow rate. When using a critical orifice flow restrictor for passive integrated sampling, take into account the decrease in flow as the vacuum in the canister changes. This can be eliminated with a Veriflo® SC423XL flow controller. This flow device incorporates a metal diaphragm downstream of the critical orifice to regulate the flow as the pressure in the canister changes. This controller is capable of maintaining a continuous low flow with vacuum ranges from 29.9″ Hg to 7″ Hg.
When collecting passive air samples, the final pressure in the canister is held to between 10″ Hg to 5″ Hg. For example, a 6 liter canister yields a 4 to 5-liter sample. It is important to incorporate an in-line filter to prevent particles from entering the critical orifice or the flow controller. Particles can clog the critical orifice, which will affect the flow through the controller. A vacuum gauge also is recommended to monitor the change in pressure during sampling. The initial and final vacuum readings should be recorded for chain of custody and sample volume calculations.
Assembly
1. Remove the protective cap on the back of the Veriflo® SC423XL flow controller.
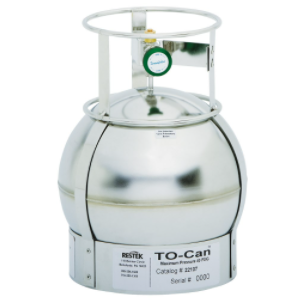
2. Connect an evacuated SilcoCan® canister, TO-Can® canister, or vacuum source to the outlet of
the sampling kit or the outlet of the Veriflo® SC423XL flow controller.
3. Connect a high-quality calibrated flowmeter to the inlet of the sampling kit and apply vacuum.
4. Adjust the piston gap screw to the desired flow using a 3 mm allen wrench. Allow several minutes for the flow to equilibrate between adjustments.
5. Replace the protective cap once the proper flow has been set.
Changing the Critical Orifice*
1. Disassemble the passive air sampling kit at the inlet end of the interchangeable critical orifice.
2. Choose the proper orifice size for desired flow range
3. Remove existing critical orifice.
4. Install the proper critical orifice using PTFE tape around NPT threads.
5. Reassemble sampling kit
*Replacing the 2 μm frit and spring washer is recommended when changing the critical orifice
Replacing the 2 μm Frit and Spring Washer
Loosen lower ¼” nut on sample tube. Remove sample tube and remove the 2 μm frit and spring
washer. Replace with new washer and frit; reinstall sample tube.
Cleaning for Reuse
Once the sampling kit has been used in the field for collecting a sample, we recommend cleaning
the complete kit before reuse.
Extensive cleaning practices ensure a clean air-collecting system. There are several different cleaning techniques depending on the concentration of the sample collected. If the kit and the components of the kit are disassembled for cleaning, we recommend leak-checking after reassembly.
Some suggestions for cleaning are:
• Flush the complete sampling kit with humidified ultra-high purity (UHP) air or nitrogen.
• Apply low heat while flushing with gas to drive off contaminants. Note that 94 °C is the maximum allowable temperature for the assembled unit.
• If kit and components are disassembled, we recommend sonicating component parts in methanol. This includes the particulate filter and Veriflo® SC423XL flow controller.
Note: To prevent damage, do not sonicate the orifice and the O-rings.
• For extremely contaminated sampling systems, heat treat component parts in an oven at 100 to 150 °C following sonication in methanol. Do not include O-rings, gauges, and other materials that cannot withstand these temperatures.
• Reassemble and leak-check. Readjust flow rate according to the steps listed in the Flow Rates section.
Repair Service
Normal wear and tear on flow controllers and sampling kits may result in damage causing leakage. This service allows you to extend the life of your equipment for much less than the cost to replace with new equipment. If you would like to take advantage of this service, contact your
Restek representative or Customer Service at 1-800-356-1688. You will be given instructions and an SRV # to return the parts to us.
550131 Sampling Kit/Flow Controller Repair. (Includes all new rubber seals in flow controller, orifice, and frit replacement.)





Reviews
There are no reviews yet.